Thursday, December 16, 2010

French Macaroons...Thanks Martha!


My husband and I enjoyed some very tasty French Macaroons at Bouchon Bakery when we visited Napa Valley earlier this year. I scarfed down the Chocolate Hazelnut Macaroon like there was no tomorrow. Andy enjoyed the Pistachio Macaroon; but the Chocolate Hazelnut took the prize! I have been looking for a bakery in San Antonio that sells the French style; but have not found one as of yet. I think next week, during my time off from work, I will attempt this following recipe I found on Martha Stewart's website. Wish me luck!

INGREDIENTS
Makes 35 macaroons
1 cup confectioners' sugar
3/4 cup almond flour
2 large egg whites, room temperature
Pinch of cream of tartar
1/4 cup superfine sugar
3/4 cup seedless raspberry jam, for filling

MACAROON VARIATIONS
Chocolate: Substitute 3 tablespoons unsweetened Dutch-process cocoa powder for 1/4 cup of the almond flour.
Coconut: Substitute 2 tablespoons desiccated unsweetened coconut for 2 tablespoons of the almond flour, and add 1/2 teaspoon rum; sprinkle with additional coconut before baking.
Peanut: Substitute an equal amount finely ground unsalted peanuts (peanut flour) for the almond flour.
Pistachio: Substitute 1/2 cup finely ground unsalted pistachios (pistachio flour) for 1/2 cup of the almond flour, and add 2 to 3 drops forest-green gel-paste food coloring.
Raspberry: Add 1 tablespoon fresh raspberry puree, strained, plus 3 to 4 drops dusty- rose gel-paste food coloring.
Vanilla Bean: Add 1/2 teaspoon pure vanilla extract or seeds from 1/2 vanilla bean, split and scraped, pod reserved for another use.

SUGGESTED FILLINGS FOR MACAROONS
Chocolate: Chocolate Ganache
Coconut: 1 cup Swiss Meringue Buttercream, mixed with 1/3 cup angel-flake coconut.
Peanut: Chocolate Ganache, or store-bought dulce de leche, jam, or peanut butter.
Pistachio: 1 cup Swiss Meringue Buttercream, mixed with 1/3 cup finely chopped pistachios.
Raspberry: 3/4 cup seedless raspberry jam
Vanilla Bean: 1 cup Pineapple Buttercream , 1 cup Swiss Meringue Buttercream, or 3/4 cup store-bought jam or preserves.

DIRECTIONS
Pulse confectioners' sugar and almond flour in a food processor until combined. Sift mixture 2 times.

Preheat oven to 375 degrees. Whisk whites with a mixer on medium speed until foamy. Add cream of tartar, and whisk until soft peaks form. Reduce speed to low, then add superfine sugar. Increase speed to high, and whisk until stiff peaks form, about 8 minutes. Sift flour mixture over whites, and fold until mixture is smooth and shiny.

Transfer batter to a pastry bag fitted with a 1/2-inch plain round tip, and pipe 3/4-inch rounds 1 inch apart on parchment-lined baking sheets, dragging pastry tip to the side of rounds rather than forming peaks. Tap bottom of each sheet on work surface to release trapped air. Let stand at room temperature for 15 minutes. Reduce oven temperature to 325 degrees. Bake 1 sheet at a time, rotating halfway through, until macaroons are crisp and firm, about 10 minutes. After each batch, increase oven temperature to 375 degrees, heat for 5 minutes, then reduce to 325 degrees.

Let macaroons cool on sheets for 2 to 3 minutes, then transfer to a wire rack. (If macaroons stick, spray water underneath parchment on hot sheet. The steam will help release macaroons.)

Sandwich 2 same-size macaroons with 1 teaspoon jam. Serve immediately, or stack between layers of parchment, wrap in plastic, and freeze for up to 3 months.

Read more at Marthastewart.com: French Macaroons - Martha Stewart Recipes

Tuesday, December 14, 2010

A Peacock Inspired Holiday

One of my favorite decor themes right now is Peacock Feathers. Weddings have had the theme for a few years; but overall home decor is just now starting to peak with the influence. This year, why not try something different when it comes time to decorate for the Holidays. Decorate your home with style and in warm hues of rich blues, plum, emerald, turquoise, and gold. Inspiration is the name of the game, so here are a few gems I found on the web:


Tuesday, December 7, 2010

Victorian Postcard Christmas Cookies


Looking for a new holiday cookie favorite that will wow your family and friends? Then discover the magic of wafer paper. Simple to use and absolutely stunning. Featured today are the Victorian Postcards designs from http://www.fancyflours.com/; one of my favorite websites.

Make quick, easy, and creative cookie and cake decorations with these edible, sugar free printed wafer paper designs. Wafer Paper is an edible starch based confection, made of potato starch, water and vegetable oil. It is printed with food safe ink. Wafer paper is fragile, so handle it carefully. It can be placed on top of any frosting: butter cream, royal icing, or fondant.

Directions for use: To decorate cookies, cut out the postcard images with craft scissors. You can either apply the image directly to the cookie or you can apply the image to a frosted cookie. Firm icing works best--royal icing or fondant. If applying the design to royal icing, the icing must be completely dry for best results. Simply spread a thin layer of light corn syrup to the back of your wafer paper image and then apply the image, picture side up to the cookie. To ensure a smooth finish, turn the cookie over, wafer paper side down, on a piece of parchment paper for approximately 30 minutes. To completely dry, turn the cookie design side up for 12 hours.

You can add a 3 dimensional effect by adding small sugar pearls, dragees, sugar decorations or edible glitter.

Tis' the season, enjoy!

Friday, November 19, 2010

Spirited Slow Cooker Hot Java Coco


Brandy adds a spirited punch to this coffee-flavored hot chocolate.
Prep: 2 minutes, Cook: 5 hours
Slow-Cooker Size: 4-quart
Yield: Makes 10 cups

Ingredients
· 8 cups milk
· 1 cup (6-ounce package) semisweet chocolate mini-morsels or 6 (1-ounce) semisweet chocolate baking squares, chopped
· 1/2 cup powdered sugar
· 1/4 cup instant coffee granules
· 1 cup brandy
· Sweetened whipped cream (optional)
· Grated semisweet chocolate (optional)

Preparation
Combine first 5 ingredients in a 4-quart slow cooker.
Cover and cook on LOW 4 to 5 hours or until thoroughly heated and chocolate is melted, whisking after 2 hours. Whisk before serving. Serve with sweetened whipped cream and grated chocolate, if desired.


Party Tip: Serve this spiked favorite straight from the slow cooker.

Tuesday, November 16, 2010

All I Want for Christmas is a Life-Sized Snow Globe!


OMG! Take a look at this! Add this to my "Things I Want, But Never Gonna Get" Christmas Wish List! How cool would it be to own one of these?

A must for that next over the top Holiday Party. Seriously, I wonder what it is like to be inside. Your own personal little bubble world with swirling confetti.

Also a crowd pleaser because this concept is so versatile. You could have the Nutcracker Ballerina inside as pictured; but possibilities are endless. How about a little Snowman. Toy Soldier. Santa. Elves. The list goes on and on....

Seriously though... you know you want one!

Friday, September 10, 2010

Lipsology (Tarot Card reading... but with Lips?)


The next big event fad? Why not.

The Art & Science of Lip Print Reading, Lipsology was founded by Jilly Eddy, the world’s leading expert in lip print interpretation.

"Jilly uses Lipsology to assess your guests’ personality characteristics and energy levels based on each individual’s lip prints. This entertainment is amazing and fun and something you’ll never forget.

The world’s first Lipsologist, Jilly Eddy is an engaging Seattle-based entertainer who fascinates audiences of all ages with her remarkably precise personality profiles based on her self-developed system of Lipsology—The Art & Science of Reading Lip Prints.

Jilly has spent nearly 30 years collecting and analyzing more than 10,000 lip prints including those of Johnny Cash and author Jean Auel. She offers her warm sense of humor and incredible insights to the lives of thousands—making a unique and memorable impression and often affecting personal reflection and change.

Jilly’s work has been featured in The New York Times, The Chicago Tribune, Los Angeles Times and The Seattle Times. She has also been interviewed on numerous regional television and radio shows from the Northwest to Nashville."


So pucker up!

Friday, September 3, 2010

Napa Valley or Bust!


So excited!! My husband and I just booked our first vacation since our honeymoon over 4.5 years ago! I decided two days ago that I needed a vacation, and I needed a vacation NOW! I will be working an insane amount of events (almost every weekend) from September 25 – December 25. On a whim I made an executive decision to book a romantic getaway for the two of us. We will be sojourning to Napa Valley at the end of the month.

Unbeknownst to me, Fall is peak season in wine country. I am such a novice. Apparently, September is “crush” season. I scoured the internet and to my dismay found almost all of the cute, scenic Bed and Breakfasts were sold out through December. However, Lady Luck shined her glow upon me and I found one available suite in the heart of Napa Valley in the quaint town of St. Helena. We will be staying at the Ink House Bed and Breakfast; in the Vineyard Suite!

I am so excited! I have never stayed at a b&b before and am not sure what to expect. Enthralled by all things historical, here is a tidbit of info on the Ink House.:

“Built in 1884, by Theron H. Ink, this grand and historic landmark home is listed on the National Register of Historic Places. Here at his "Helios Ranch", Ink, a true pioneer, lived with his wife and children and presided over many Napa Valley ventures. This Italianate Victorian style home offers two first floor parlors, with antiques, fireplace, circa 1870 pump organ, crystal chandeliers and original stained glass. The estate sits on four acres of grand lawns, gardens, a petite sirah vineyard, olive orchards, and an 1884 barn and carriage house as well.

The guest bedrooms are situated on the second floor, each room offering a distinctive view of the vineyards, Victorian gardens and trees that were here long before the house was even built. A small parlor is also located on this floor. Each room has a queen or king sized bed and private full bathroom ensuite and are decorated in period French, English, American, Georgian, Eastlake and Italian antiques and family heirlooms. All rooms are centrally air conditioned and heated for comfort. Throughout the house, you will find a collection of distinctive original art. The house is full of wonderful antiques, collectibles and heirloom pieces that the Innkeepers hope all will enjoy. This is a home to be lived in, so each guest is encouraged to be comfortable and enjoy all the house has to offer.

At the top of the house, high above the tree tops, you may relax and make yourself comfortable in the most distinctive architectural feature of the Inn, which is a glass enclosed observatory perched 50 feet above the valley floor. Guests are able to enjoy a 360 degree sweeping panoramic vista of the surrounding vineyards and hillsides. Scottish stained glass windows enhance the 12 x 20 foot observatory where you may read, sip wine, nap, watch the sunset or the hot air balloons float by in the early morning.”

Sounds amazing! Can’t wait to share tales from our adventure! Since this is our first trip to Napa Valley, we will gladly accept advice and tips on where to eat, what vineyards to tour, and things to see/do.

http://www.inkhouse.com/

Tuesday, August 24, 2010

Abby Cadabby & Elmo Present a Tutu (2nd) Birthday Party!

Bella's 2nd Birthday Party was a success! I managed to incorporate her favorite characters Abby Cadabby and Elmo along with a Tutu theme. Vibrant splashes of Pink, Purple, Teal, Yellow and Red set the stage. Here are a few pictures of the details.


Friday, August 13, 2010

Crochet - The Lost Art (or so I thought...)

I was scouring Etsy.com today and stumbled across these adorable finds. My grandmother was amazing and crocheted the best gifts. Some of my most cherished snuggly soft blankets were made by her over the years. Its pictures like this that make me wish I had taken her “How to Crochet” demonstrations a little more seriously. She tried really hard to pass on her craft to at least one grand-daughter. I know the basic stitch and have made small simple things like pot holders, scarves, and the first 10 inches of an afghan blanket. Maybe someday I will have the time to fine tune my abilities and make her proud!


Thursday, August 12, 2010

Get Lit Thursday: Pictures Say A Thousand Words


Stumbled across this picture on the Internet today. Here is something new that I haven't seen incorporated too much into current special event lighting. I absolutely love this effect. What a great way to dress ordinary walls and transform the room into anything you want. Love this Baseball themed event. The pictures create an atmosphere out of what appears to be an otherwise very basic room. This effect is great for either color photographs as well as black and white.

Moonlit Twist: I would love to transform a room with the brightly colored lights (pictures) of old (vintage) Christmas postcard water color images. Can you imagine the rich color palette spilling across? Stagger the images to be off center and voila!

This technique is accomplished with LCD projectors. This very same technique could also be used to show a short moving clip. Perhaps dine amongst the canopy of jungle trees and vines; while be watched by chirping frogs and swinging monkeys? Fabulous!

Wednesday, August 11, 2010

DIY- Chocolate Cups


Spoiler Alert! I will be making these little gems for Bella's 2nd Birthday Party in a few weeks. These chocolate cups are super easy and can be made in a variety of colors. Simply purchase your favorite meltable dipping chips from the grocery store, Michael's or Hobby Lobby.

1. You'll need to blow up a number of small balloons to about the size of a coffee cup.

2. Melt your favorite dipping chocolates or chips in a large bowl whose depth of the melted chocolate is approx 3-4 inches deep to ensure the balloons can be dipped to their half mark.

3. Holding where the balloon closes, dip balloon's bottom into the chocolate to coat it. You can also marbleize the chocolate before dipping. Be fun an creative and mix some colors together!

4. Place the balloon on a lined cookie sheet holding it at the top so the excess chocolate starts to settle to create a bottom. The balloon will eventually stand on its own. Repeat the process for as many cups as you'd like to make. Then place the pan into the refrigerator for 5 to 8 minutes. When you remove the pan from the refrigerator, the chocolate surrounding the balloons should be hard.

5. Prick the balloon with a pin to deflate it. Carefully remove from the chocolate cup. If the room is warm, store in the refrigerator before filling.

6. When you're done, you can fill the cups with fruit (berries work well) and whipped cream, chocolate ganache mousse, cold pudding or ice cream.

Enjoy! Super fun to make as well!

Monday, August 2, 2010

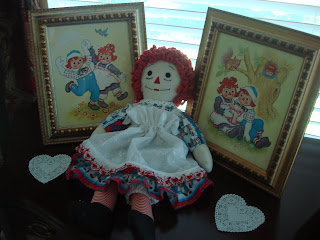
Vintage Raggedy Ann & Andy: The Tradition

Several decades ago a tradition was born. Little did my mom know it at the time, but she was setting the party stage for generations to come. My middle sister had a Raggedy Ann & Andy 1st birthday theme in the 70’s. When she had her first daughter she had the perfect theme already in mind for that 1st birthday. Raggedy Ann & Andy! Well here we are the year 2010; and once again my sister held onto her tradition of the Raggedy Ann & Andy 1st Birthday theme for her youngest daughter.

My mom and sister did an amazing job pulling together a vintage themed birthday party. Some of the décor pieces are vintage from my sister’s room growing up as a child. It is not easy to find Raggedy Ann & Andy party supplies these days. With a little imagination and a lot of creativity from my mom, they were able to transform the ordinary into the extraordinary. Everything was made by hand and customized for the special occasion. My mom is my muse and inspiration. There is nothing she can’t do or make by hand. So much love goes into her work.

Here are the 1st birthday girls from far right to left: My sister, her oldest daughter, and her youngest daughter. They are all complete with their own hand-sewn Raggedy Ann & Andy dresses. Tradition is a beautiful thing!


Thursday, July 29, 2010

Here's to Looking at Ceilings!

My favorite day of the week… “Get Lit Thursday.” Today’s edition is focused on ceiling lighting. Special lighting can go a long way in transforming any room with high impact. So many people focus on what is at or below eye level. Think about it. Table linens, table centerpieces, favor stations, buffets, and bars. Break outside of the normal sight lines and direct your guest’s attention elsewhere for a change. The sky is the limit! Let’s think up, way up! Consider decorating those hard to reach ceilings with the help of Leko, Parcan and LED instruments. The possibilities are endless. Here are five of the most versatile ways to dress up the ceiling with the help of trained professional! Royal Ceiling Drapes, Illuminated Paper Lanterns, Gobo Break-Up Pattern, Basic Flood Lighting, and a little bit of Twinkle!


Roll the Credits:

http://wifeinslowmotion.files.wordpress.com/2008/10/ceiling_paper_lights.jpg
http://www.nomadsound.com/Web%20Photos%20Large/mellon_04.jpg
http://specialeventdecorators.com/wp-content/gallery/royal-draping/golden_dream.jpg
http://www.soundlightingfx.com/sitebuilder/images/accentlighting-twinklelights-444x311.jpg
http://www.eventlightingsolutions.com/sitebuilder/images/light4-592x346.jpg

Friday, July 23, 2010

Favor Friday: NACE & Guitars Edition


I am very excited to report that I will be attending the NACE Experience! Conference next week. This year’s event is sure to hit a high note as big as Texas in the eclectic capital city of Austin, TX. I am looking forward to networking with catering and event professionals from around the country, bonding with my fellow Alamo Chapter members, and experiencing the sights, sounds, tastes, and feel of the city limits.

In honor of Favor Friday and my excitement for the NACE conference, I want to spotlight custom iced cookie favors from The Flour Pot. These little gems of sugary goodness are sure to dazzle the crowd at your next big Rock Star inspired event. Let the good times roll with these sweet guitar shaped cookies. Finish the look with a clear cellophane bag and a music note gift tag.